Your profile holds your personal information and preferences. This guide shows you how to update and manage your account settings.
Accessing Your Profile
Open Settings
Click your name or avatar in the sidebar, then open Settings.
Go to Account
Select Account (
/settings/account). This is where your personal details, linked accounts, and data live.
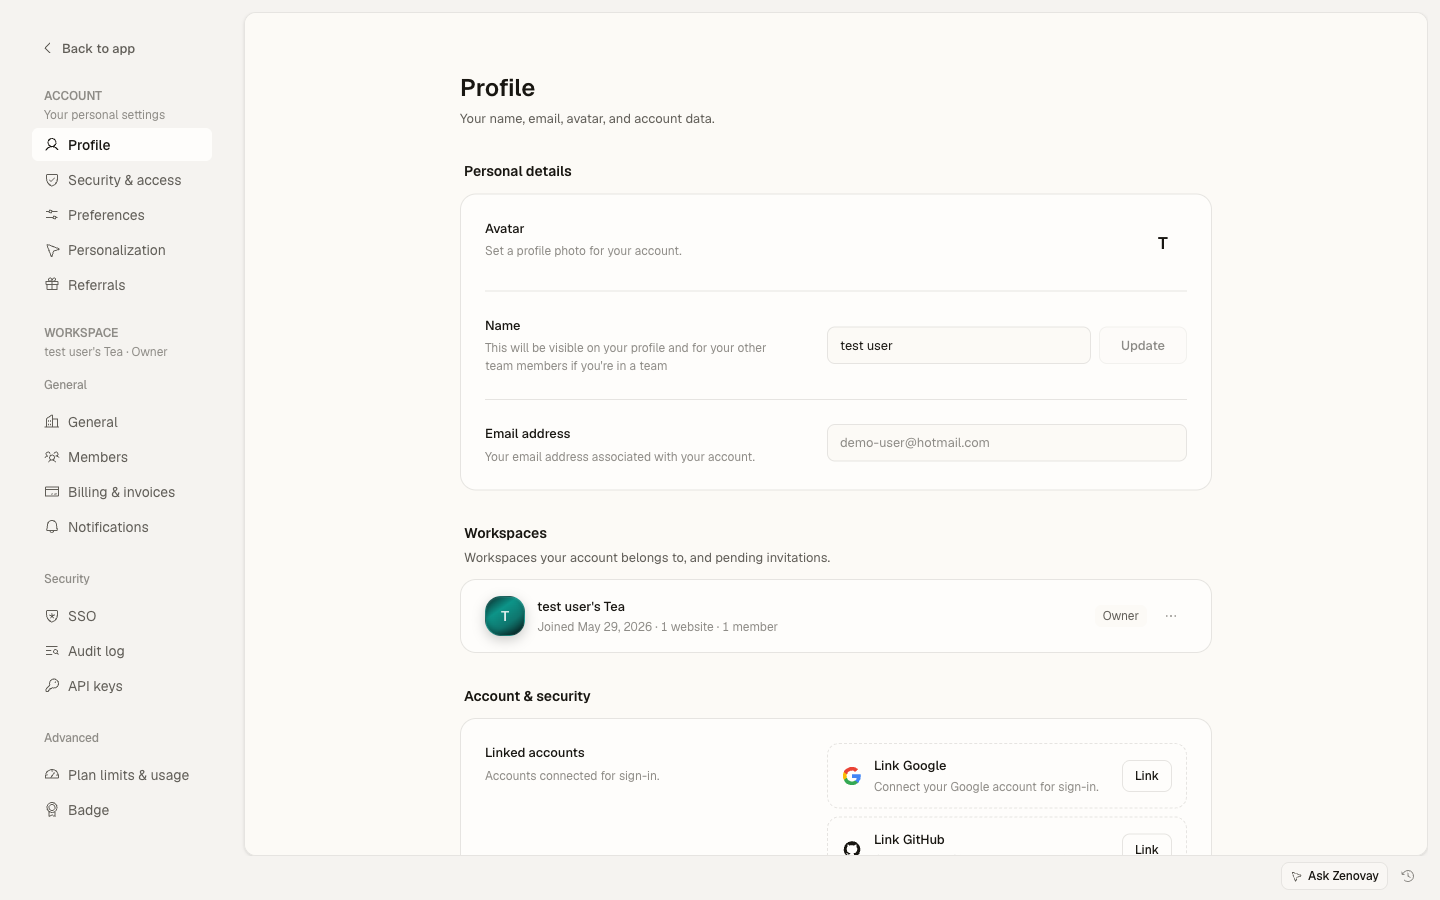
The old /profile links still work, they redirect to the matching Settings → Account page.
Profile Information
Display Name
Your display name appears:
- In team member lists
- In activity logs
- In shared dashboards
- In email communications
To change your display name:
- Go to Settings → Account
- Edit the Name field
- Click Update
Email Address
The email shown on Settings → Account is read-only. It is your sign-in identity and the address Zenovay uses for password resets, security notifications, and team invitations.
Because the email is tied to your login and security history, it cannot be changed inline from this page. See How to Change Your Account Email for how the address works and how to get it updated, including how accounts that sign in with Google, GitHub, or SSO are handled.
Profile Avatar
Your avatar appears throughout Zenovay.
To upload an avatar:
- Go to Settings → Account
- Click your current avatar (or initial)
- Choose an image file
- Zenovay resizes and saves it automatically
Zenovay accepts standard image files (such as JPEG, PNG, GIF, and WebP) up to 5MB. The image is resized for you, so there is no separate crop step.
Account Preferences
Personal preferences live on Settings → Account → Preferences (/settings/account/preferences).
Language
Zenovay's interface is available in six languages:
- English
- Deutsch (German)
- Français (French)
- Español (Spanish)
- Português (Brasil)
- 日本語 (Japanese)
Pick your language under Language on the Preferences page. The change applies immediately.
Time Format
Choose how times display across the dashboard:
- 12-hour (2:30 PM)
- 24-hour (14:30)
Blur Identifiers
Toggle Blur identifiers to mask sensitive identifiers (like visitor emails) in the dashboard, which is handy when you're sharing your screen or recording.
Email Preferences
Control which emails you receive from the Email notifications section on the Preferences page. Each one is an independent on/off toggle:
| What it sends | |
|---|---|
| Weekly Reports | A weekly analytics summary every Monday for your websites |
| Traffic Spike Alerts | A heads-up when your websites see unusual traffic spikes |
| Anomaly Alerts | A heads-up about unusual patterns in your analytics |
| Conversion Incidents | A heads-up when your conversion rate drops significantly |
| Newsletter | Product updates and tips from the Zenovay team |
Appearance
Theme
Switch between light and dark mode from the theme control at the bottom of the sidebar:
- Light mode
- Dark mode
- System default (follows your OS setting)
Connected Accounts
If you sign in with a social provider, your linked accounts are managed on Settings → Account.
Google and GitHub
- View your connected Google or GitHub account
- Link an additional provider
- Set a linked provider as your primary sign-in method (used when you sign in with email-first)
Before relying on a single provider, make sure you have another way to log in (a password or a second linked account) so you don't get locked out.
Managing Connections
To manage connected accounts:
- Go to Settings → Account
- Find the linked accounts section
- Click Link to connect a new provider, or use the account menu to set a primary
Developer Settings
API Keys
API access requires a paid plan.
- Team API keys live under Settings → Security → API keys (
/settings/security/api-keys). - Personal API tokens live under Settings → Account → Security (
/settings/account/security).
See API Authentication for details.
Exporting Your Data
You can download a copy of your personal data at any time, on every plan:
- Go to Settings → Account
- Click Export my data
- Your data downloads as a JSON file
The export includes your profile and consent flags, preferences, team memberships, connected integrations, onboarding progress, and the in-app activity tied to your account.
Account Security
Your sign-in security settings, two-factor authentication, password, backup codes, and your own login sessions, live on Settings → Account → Security (/settings/account/security). You can also enable or disable two-factor authentication directly from Settings → Account.
Deleting Your Account
To permanently delete your account, scroll to the bottom of Settings → Account and use Delete account. You'll be asked to type DELETE to confirm. This action is irreversible.
Troubleshooting
Changes Not Saving
- Check for validation errors on the field
- Make sure required fields are filled
- Refresh and try again
- Try a different browser
Avatar Not Updating
- Clear your browser cache
- Wait a moment for caching to clear
- Try a different image
- Check the file is under 5MB and is a standard image format