Adding your website to Zenovay is the first step to understanding your visitors. This guide walks you through the complete setup process.
Prerequisites
Before you begin, ensure you have:
- A Zenovay account (free tier works great)
- Access to your website's HTML or CMS
- Your website's domain name
Adding Your Website
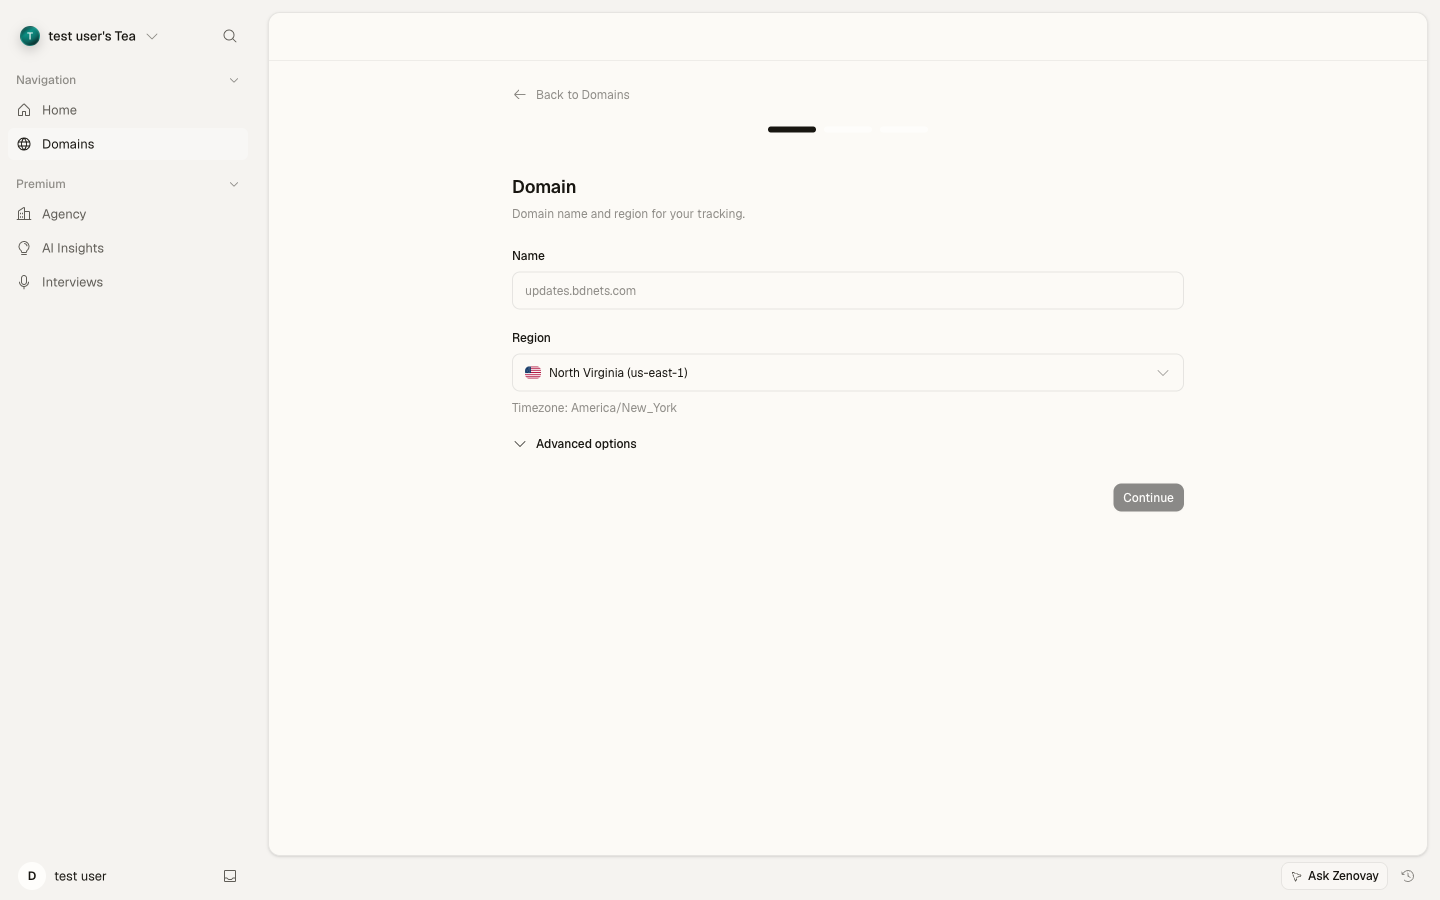
Open the Domains page
Log in to app.zenovay.com, then go to Domains in the sidebar and click Add Website.
Enter Your Domain
Enter your website's domain name. You can enter:
- Just the domain:
example.com - With subdomain:
blog.example.com - With www:
www.example.com
Enter the exact domain visitors use. If your site redirects www to non-www (or vice versa), use the final destination domain.
- Just the domain:
Pick a region
Choose the region closest to your visitors. The region you pick also sets the default reporting timezone. You can change the timezone later in the website's settings.
Name your website (optional)
Expand Advanced options to set a friendly display name. If you skip this, Zenovay derives a name from your domain.
Get Your Tracking Code
When you continue, Zenovay creates the website and shows your unique tracking snippet (with a ready-to-copy HTML, React, Next.js, and first-party version). The setup screen waits for the first event so you can confirm tracking is live before you finish.
Website Configuration Options
After adding your website, open it from the Domains page and use its settings tabs to configure it. The settings live under the General, Advanced, and Exclusions tabs.
General Settings
| Setting | Description |
|---|---|
| Domain | The domain Zenovay tracks |
| Timezone | Reporting timezone for the dashboard |
| Brand color | Accent color used in widgets and the public dashboard |
| Primary KPI | The headline metric for this website (e.g. revenue) |
| Public dashboard | Generate a shareable, view-only link to this website's stats |
| Cookieless mode | Track without cookies |
Advanced Settings
| Setting | Description |
|---|---|
| Session timeout | Minutes of inactivity before a new session starts (5–120, default 30) |
| Track outbound links | Record clicks on links that leave your site |
| Cookie lifetime | How long the visitor cookie lasts (when cookies are used) |
| Excluded routes | Paths that should not be tracked |
| Mask inputs / Mask text | Hide input values or text in session replay |
| Debug mode / Allow localhost | Developer aids for testing the installation |
Zenovay anonymises visitor IPs and filters known bots automatically. You don't need to enable these.
Tracking Multiple Domains
Different Websites
For separate websites, add each one individually:
- Add each website from the Domains page
- Each gets its own tracking code
- Each has separate analytics
Website Limits by Plan
Free: 1 website | Pro: 5 websites | Scale: 10 websites | Enterprise: Unlimited
Linking Domains for Cross-Domain Journeys
If a visitor moves between two domains you own (for example a marketing site and a checkout subdomain on a different domain), you can link them so journeys stay connected across the boundary:
- Add each domain as its own website
- Open one website's settings and go to the Cross-Domain tab
- Enable cross-domain tracking and link the related website
Each website keeps its own tracking code and its own analytics; linking only connects the visitor journey across them.
Subdomains
Subdomains of the same root domain (for example blog.example.com and shop.example.com) are tracked together automatically when you use the same tracking code on each. If you'd rather keep a subdomain's analytics separate, add it as its own website with its own tracking code.
Understanding Your Tracking Code
Each website gets a unique tracking code that Zenovay generates for you. The setup screen shows the full snippet to copy. The HTML version looks like this:
<script defer
  data-tracking-code="YOUR_TRACKING_CODE"
  src="https://api.zenovay.com/z.js">
</script>
Keep your tracking code private. Anyone with access can send data to your analytics.
Managing Multiple Websites
Switching Between Websites
Use the website list on the Domains page (or the sidebar) to switch between your websites.
Website Organization
For accounts with many websites:
- Use clear, descriptive names
- Consider naming conventions (e.g., "[Client] - Site")
Deleting a Website
To remove a website:
- Go to the Domains page
- Open the menu (
...) on the website's row - Click Delete and confirm
Deleting a website permanently removes all analytics data. This action cannot be undone.
Next Steps
Now that your website is set up:
- Install the tracking script on your website
- Verify your installation is working
- Understand your dashboard
- Set up conversion goals
Troubleshooting
Website Not Showing Data
- Verify tracking script is installed correctly
- Check if the tracking code matches the one in your dashboard
- Visit your website, then check the Live View tab
- See Tracking Not Working
Wrong Timezone Data
- Update the timezone in the website's General settings
- Note: Changes apply to future data only
- Historical data keeps its original timezone
Duplicate Websites
If you accidentally created duplicate websites:
- Identify which has more data
- Update the tracking code on your site to use the correct one
- Delete the duplicate from the Domains page